
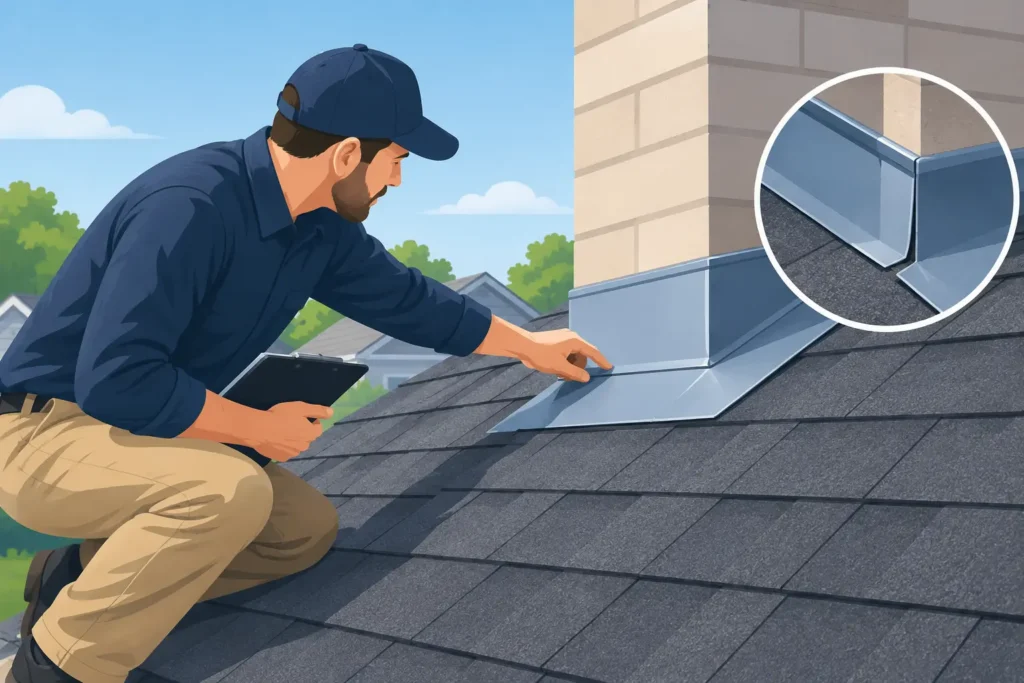
A roof can look sound from the ground while a small split in its flashing allows water into the structure. Flashing is one of the most important weatherproofing details on any roof, particularly around chimneys, valleys, skylights, dormer windows and roof-to-wall junctions. Knowing how to inspect roof flashing helps you spot concerns before a wet Northamptonshire winter turns a minor repair into damaged timbers, stained ceilings or a more extensive roof repair.
The key is to inspect carefully without taking unnecessary risks. Most early warning signs can be identified from ground level, inside the loft or from accessible windows. If the roof is steep, high, fragile, wet or difficult to reach, leave close-up inspection and any repair work to a qualified roofer.
What Roof Flashing Does
Roof flashing is the material fitted where roof coverings meet another surface or where the roof changes direction. Its job is to guide rainwater away from vulnerable joints and into the guttering, rather than allowing it to run beneath slates, tiles or felt.
Traditional flashing is often made from lead because it is durable and can be shaped to suit uneven surfaces. Modern roofs may use aluminium, zinc, steel or purpose-made flashing systems. The material matters, but the condition of the joints, fixings and surrounding roof covering matters just as much.
A failed flashing detail does not always produce an immediate drip. Water can travel along roof battens, felt or timber before showing inside the property. That is why regular checks are worthwhile, especially after storms, prolonged rain or periods of freezing weather.
How to Inspect Roof Flashing Safely
Start from the ground on a dry, bright day. Stand far enough back to see the roof slopes clearly, then use binoculars or a mobile phone camera with zoom if needed. Do not climb onto a roof simply to get a better view. Roof surfaces can be slippery, brittle or unstable, and walking in the wrong place can crack tiles or slates.
Look at each area where flashing is likely to be present. Chimney stacks are a common starting point, followed by roof valleys, abutments where a pitched roof meets a wall, skylights and soil pipe penetrations. Compare the appearance across the roof. A section that sits noticeably proud, has lifted edges or looks uneven deserves closer professional attention.
From inside the property, check the loft during daylight hours. Turn off the loft light initially and look for pinpoints of daylight around chimney breasts, roof junctions and penetrations. Then use a torch to inspect timbers, insulation and the underside of the roof covering for damp patches, dark staining, mould or water marks. Damp insulation may feel compressed or clumped together.
Ceilings and walls below roof junctions can also tell you a great deal. Yellow-brown marks, peeling paint, bubbling plaster or a musty smell after rainfall can indicate water ingress. However, the visible stain may sit some distance from the actual defect, so it should not be treated as proof that the flashing directly above is the only cause.
Signs That Flashing May Need Repair
Some faults are visible from ground level, while others require a roofer to assess the roof safely. Pay particular attention to the following warning signs:
- Lead flashing that has lifted away from the brickwork, tiles or slates.
- Cracks, holes, tears or deep creases in the flashing material.
- Missing, loose or slipped tiles and slates beside a flashing detail.
- Crumbling mortar in chimney flashing joints, often called pointing or flaunching depending on the location.
- Gaps at roof-to-wall junctions, particularly where sealant has shrunk, split or detached.
- Rusting metal flashing, damaged fixings or sections that appear poorly overlapped.
- Moss, leaves or debris trapping water in a valley or behind a chimney.
Lead can expand and contract with changes in temperature. Over time, this movement can open joints or cause fatigue cracks, particularly on older installations. Mortar around a chimney may also deteriorate due to frost and weather exposure. These are normal maintenance issues, but they should be dealt with promptly before water reaches the roof structure.
It is also worth checking whether rainwater is being managed properly. A blocked gutter, broken downpipe or overflowing valley can force water back towards flashing that would otherwise cope perfectly well. In these cases, clearing or repairing the guttering may be part of the solution, but it is still sensible to have the flashing checked for concealed damage.
Inspect Chimney Flashing Carefully
Chimneys are one of the most frequent sources of roof leaks because several flashing components work together around the stack. There is usually a front apron, side soakers or stepped flashing, and a back gutter or saddle that directs water around the rear of the chimney.
From below, look for open mortar joints, lifted lead edges and vegetation growing from the brickwork. A dark line down the chimney breast in the loft can suggest water is entering at the flashing, although damaged brickwork, chimney pots or the chimney cap may also be responsible.
Do not rely on silicone or roofing mastic as a long-term answer to visibly failed chimney flashing. Sealants can be useful for limited detailing where appropriate, but they cannot replace properly dressed leadwork, secure stepped flashing or sound mortar joints. A lasting repair should deal with the cause of the water entry, not simply cover the visible gap.
Check Valleys, Skylights and Wall Abutments
Roof valleys handle a large amount of water, so minor defects can quickly become noticeable during heavy rain. Check for debris buildup, cracked valley lining, displaced slates or tiles, and signs that water is overshooting into the roof rather than flowing cleanly to the gutter. Valleys can be lead-lined, tiled or formed with another material, and each requires the correct repair method.
Around skylights, inspect the roof covering immediately above and to each side. Look for raised tiles, gaps in the flashing kit or staining on the internal plasterboard lining. Condensation around a window can sometimes be mistaken for a roof leak, so consider whether the issue appears only in cold weather or follows rainfall.
Where a roof meets a wall, the flashing should be neatly chased or secured into the masonry and overlap the roof covering correctly. Cracked render, failing mortar and loose brickwork can compromise this junction. On flat roofs, edge trims and upstands perform a similar role, and ponding water close to these details should be investigated.
When a Professional Roof Inspection Is the Better Choice
A visual check is useful for monitoring your roof, but it cannot confirm the full condition of hidden details. Arrange a professional inspection if you can see damaged flashing, find damp in the loft, notice a ceiling stain after rain or have recently experienced storm damage. It is also sensible to arrange a check before buying or leasing a property where the roof is older or has visible repairs.
A qualified roofer can inspect inaccessible areas, identify whether the issue is flashing, tiles, underfelt, chimney masonry or guttering, and recommend proportionate work. The right repair might be a small section of leadwork and repointing, or it may involve renewing a valley or replacing damaged roof coverings around the junction. The scope depends on the source of the fault and the condition of the surrounding roof.
For homeowners, landlords and commercial property managers, clear diagnosis matters. Repeated patch repairs can become poor value if the underlying detail has reached the end of its serviceable life. Equally, a complete replacement is not always necessary when a local repair can restore a sound roof.
Keep Records and Act Before the Next Downpour
Take dated photographs from the ground and make a note of where you have seen staining or movement. This gives you a useful record if the issue changes after poor weather and helps a roofer understand the history of the problem.
If you are unsure what you are seeing, do not wait for a visible leak to worsen. A straightforward inspection by an experienced local roofing contractor can provide reassurance, identify the right repair and help protect the property before the next spell of heavy rain.